Tag Archives: recipe

Another Cooking Class at HPBA. The theme: Eggs!

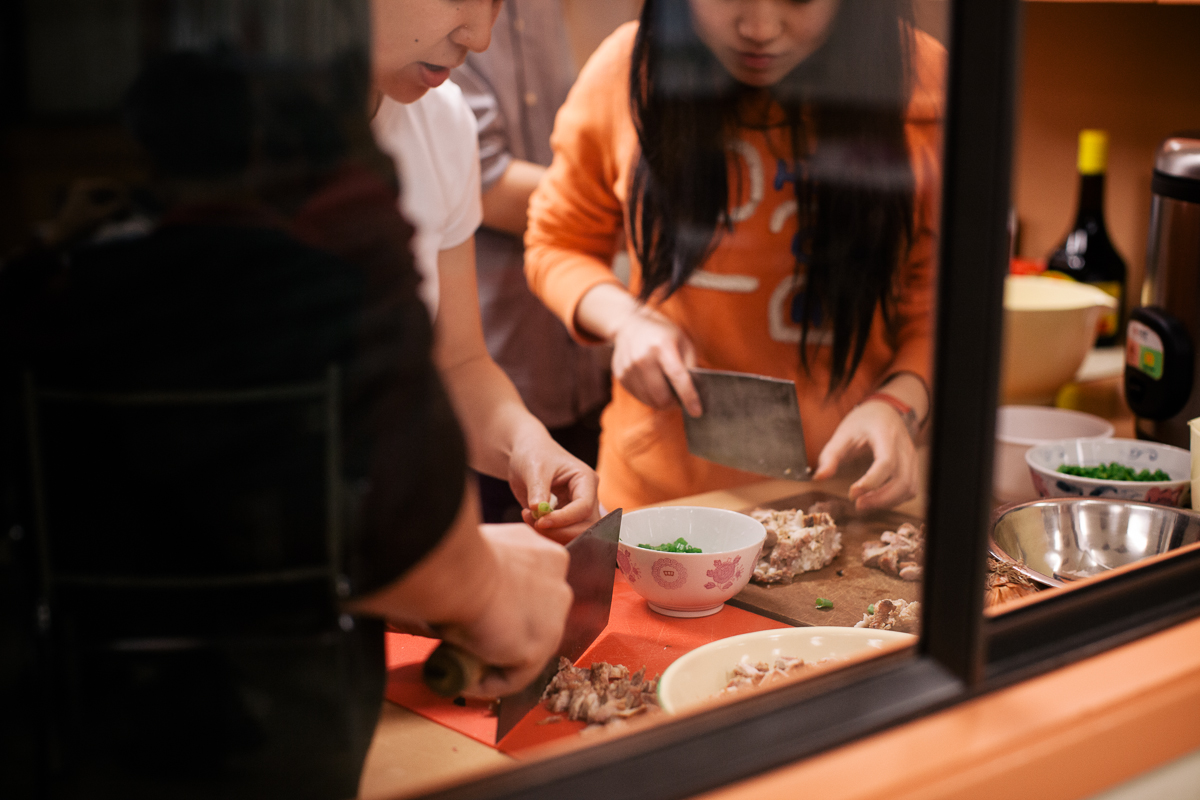
It’s been a while since our first cooking class in November but we thought we’d wait until the holiday season(s) were over (Christmas, New Year’s, Lunar New Year, Clan Association Spring Banquets and Chingming) and the commotion settled down before we started another class. This time around, we focused on the theme of eggs – quick, accessible and cheap. 

We made a simple homemade meal consisting of 2 dishes and a dessert. See the recipes and pictures below. If you try any of the dishes at home, please let us know how you did! If it doesn’t taste right, let us know and we can do some “troubleshooting”!

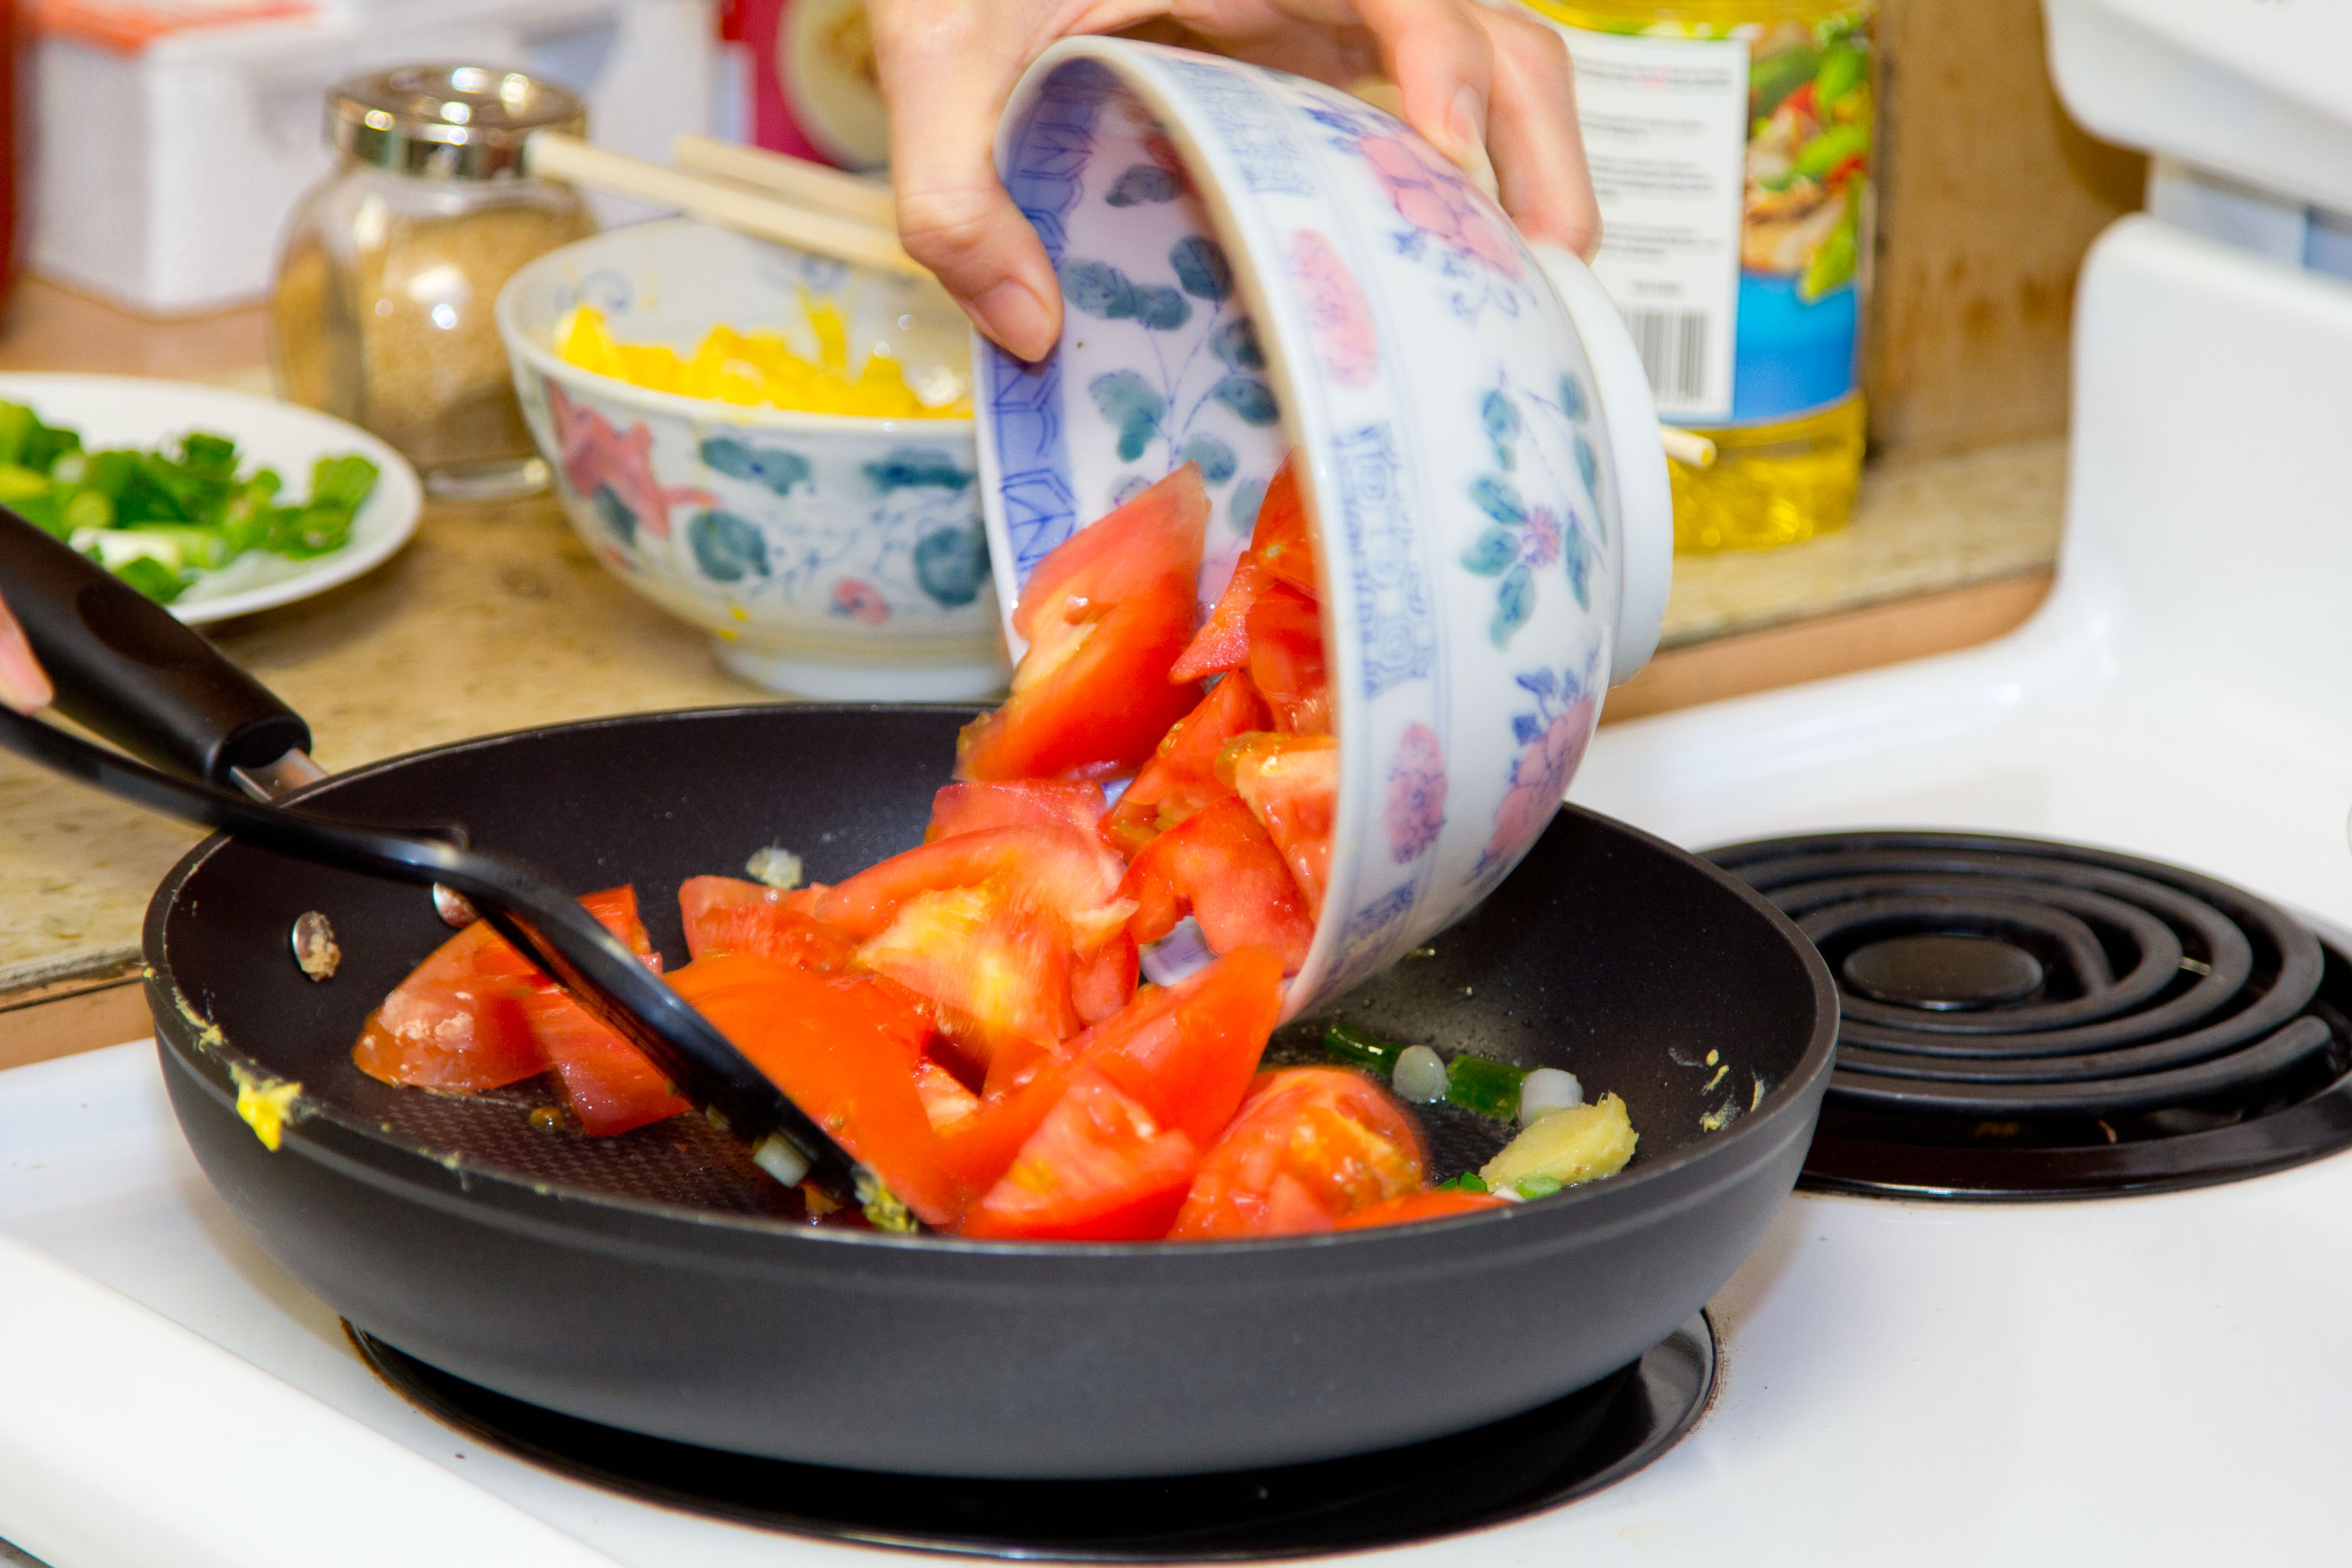
RECIPE #1  Tomato Cooked Egg – The sweet and sour flavours of this saucy dish make it appetizing and great to accompany rice (soong faan). A simple, fast dinner that kids love. In the absence of a wok, we used a frying pan, which also works.

Serves 4
3 eggs
¼ tsp chicken bouillon powder, optional
¼ tsp + ¼ tsp salt
canola oil for stir-frying
3 slices ginger
1 green onion, cut into 1-inch lengths
3 ripe tomatoes, cut into large cubes
2 tsp sugar
3 tsp ketchup
½ c water
1 tsp cornstarch

Tomato and Egg prep
Whisk eggs with ¼ tsp salt and optional ¼ tsp chicken bouillon powder. Heat canola oil (about 1 Tbsp) in wok or large frying pan on high. (The key to cooking great eggs is to make sure your pan/wok is hot before you pour in the eggs. To test if it’s hot enough, you can flick a couple drops of water onto the pan or put the end of your egg covered chopstick on the pan. If the water or egg sizzles, it’s ready) Pour in egg mix and cook as you would scrambled eggs until just barely cooked through, being careful not to overcook. Remove to your serving dish.

Give the pan a quick clean if needed and return to high heat. Add canola oil (about 1 Tbsp) and when hot, add ginger and green onion and let them sear for a few seconds. This is where lots of the flavour comes in – the “wok hay”. Add cubed tomatoes and ¼ tsp salt and stir in pan for 1 minute. Add sugar and ketchup and stir to combine flavours, for 1 minute. Add water. Cover and lower heat to medium-high, simmering for 2 minutes to break down the tomatoes.

Image
Prepare cornstarch with a little water in a small bowl making sure the cornstarch is dissolved, not settled on the bottom. Uncover and stir in reserved eggs, breaking them up a bit with your wok chaan. Slowly mix in cornstarch to thicken and create a sauce. This is called “da heen” which is to make a thick sauce. Make sure it is evenly mixed through.
Image
Serve with rice and lots of sauce!


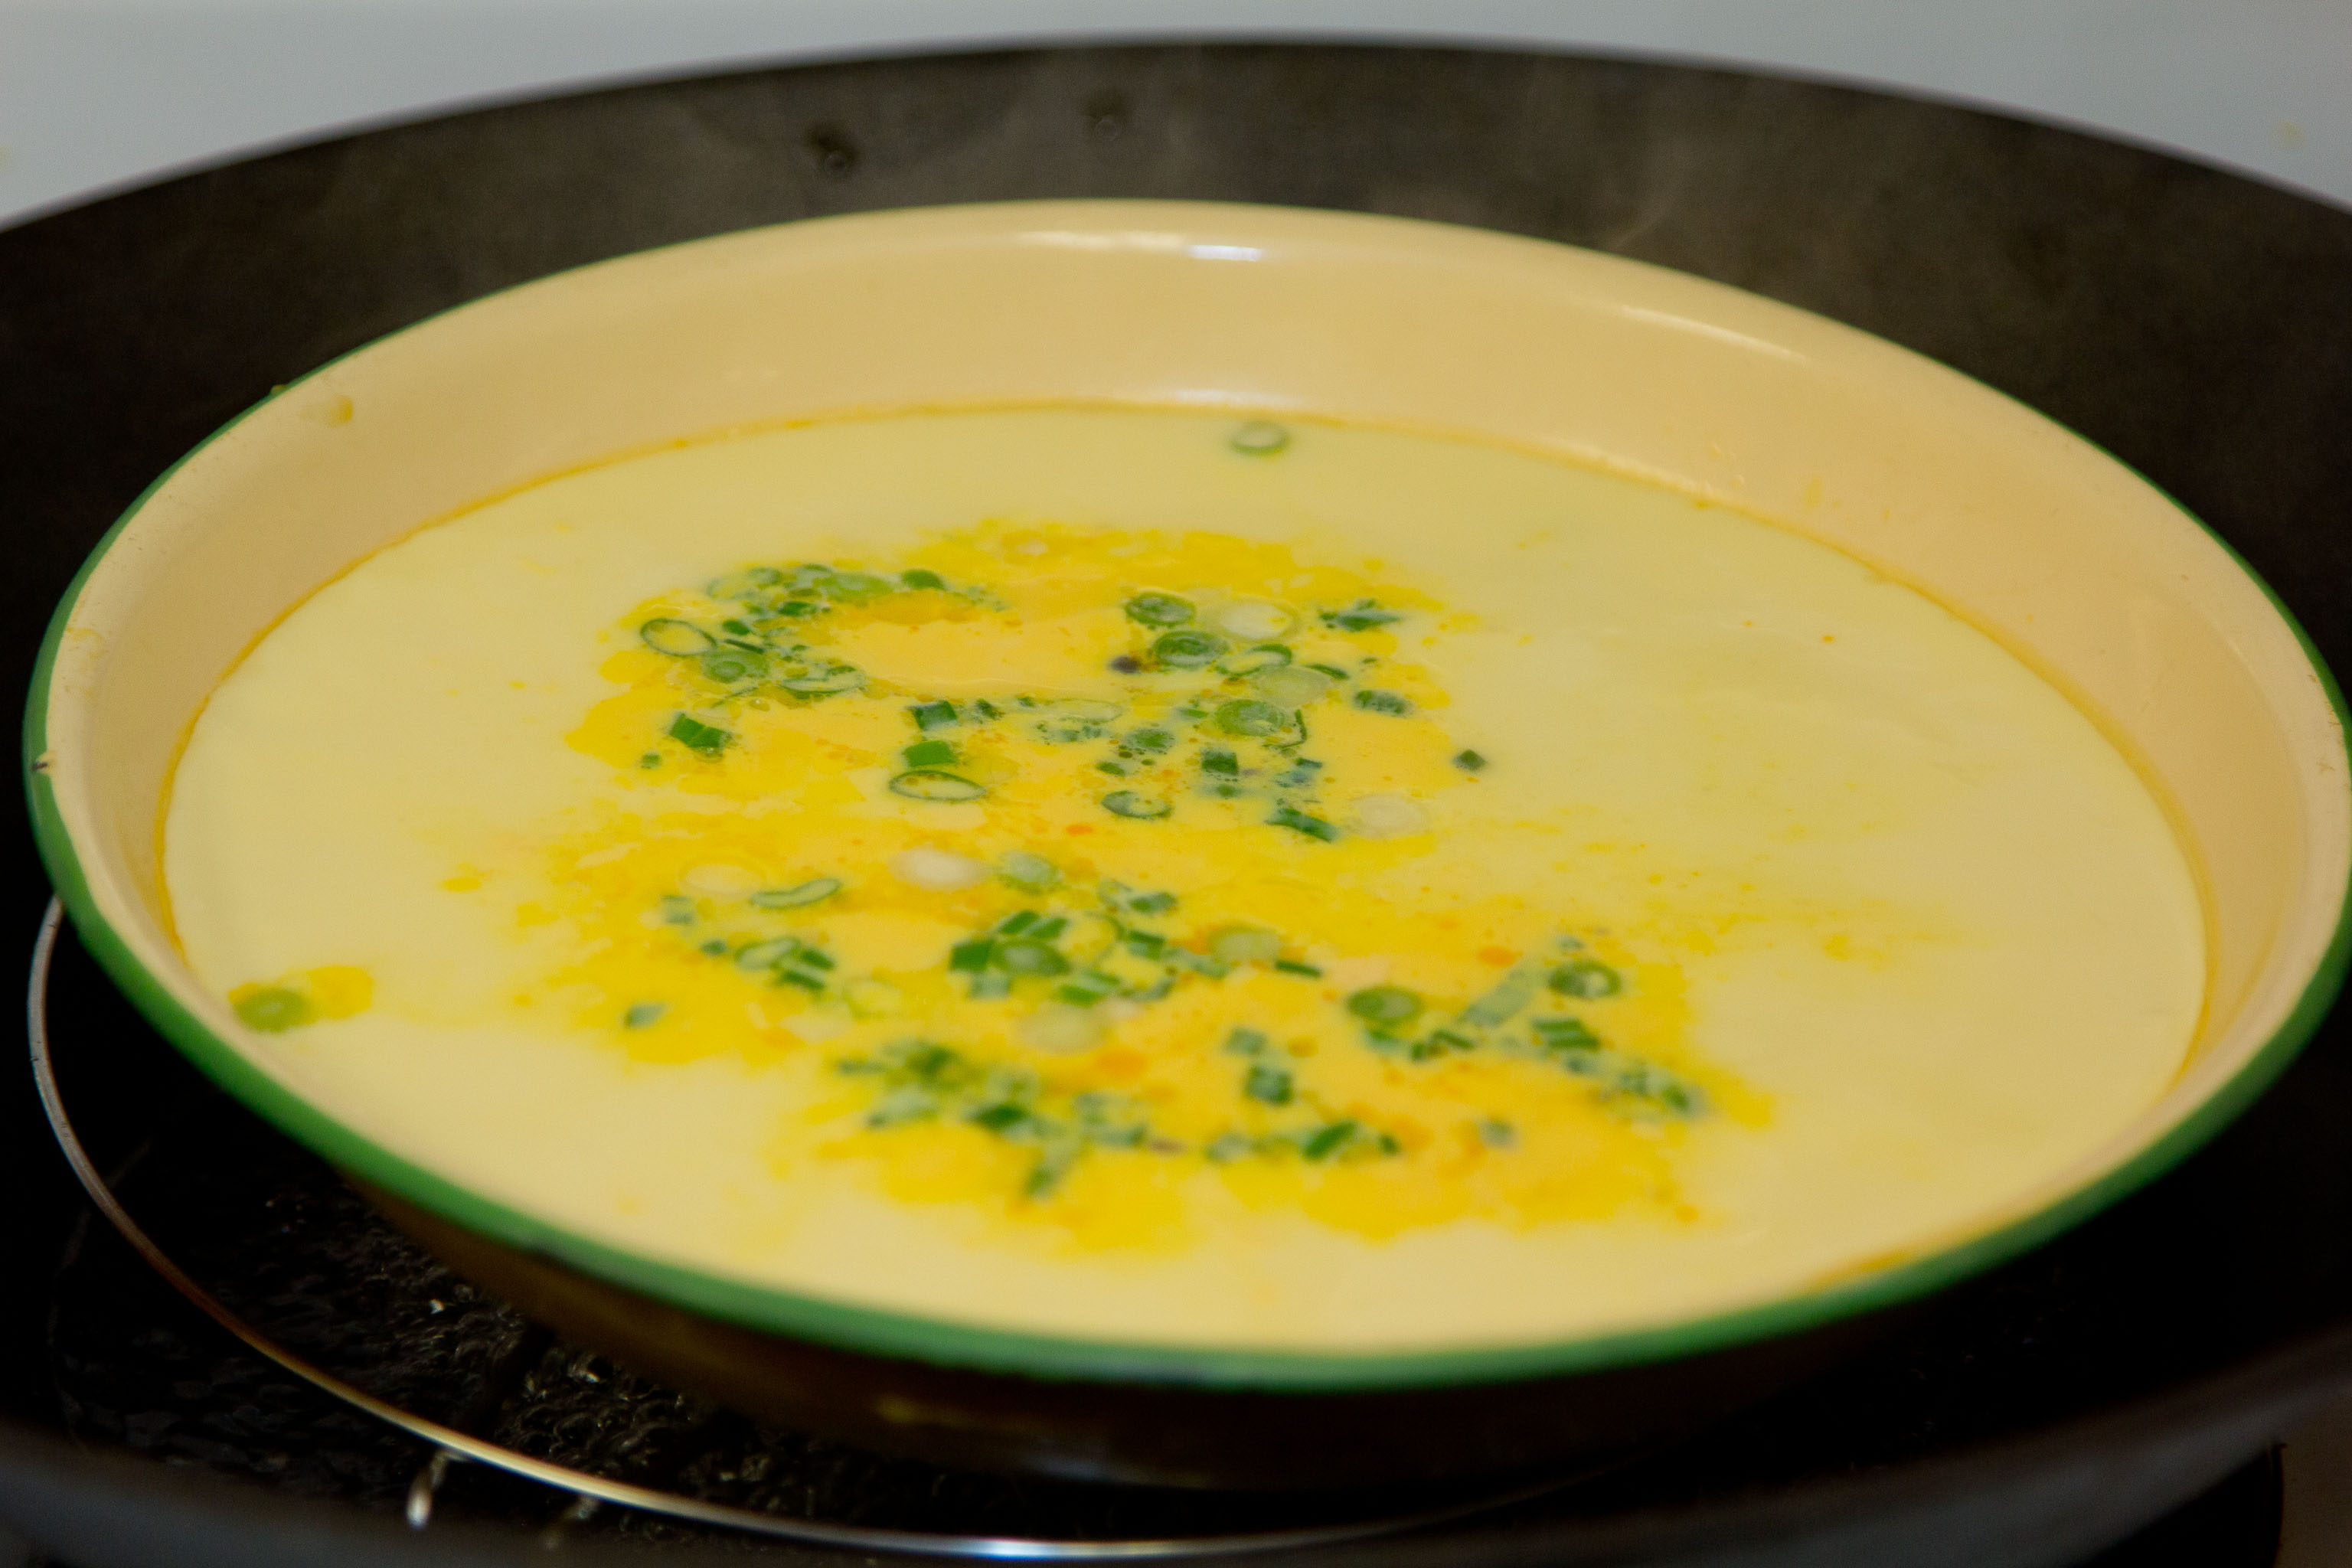
RECIPE #2 Steamed Egg Trio 蒸三色蛋 – A great contrast of comforting flavours and textures across the three types of eggs in this dish. The saltiness of the ducks eggs make it great to soong faan too. 

Serves 4
2 century eggs 皮蛋, shelled and chopped
2 salted duck eggs 鹹蛋, separated and yolks chopped, whites in a seperate bowl
3 chicken eggs 雞蛋
1 14 oz can chicken stock
1 green onion, sliced
1 tsp olive oil
1 tsp light soy sauce

Equipment needed:
– Deep plate, about 9 in. diameter
– Flat plate wide enough to cover
– Steaming apparatus: My mom uses a wide, flat-bottomed wok with a metal wire steam rack stand and about 4 cups of water. Too much and the water may boil over into the plate, too little and the wok may dry out.

Image
Spread out chopped century eggs and duck egg yolks in deep plate. Bring steamer to boil at maximum heat. Add plate of century and duck eggs. Steam with the wok lid on for 5 minutes. 

In medium bowl, combine duck egg whites, chicken eggs, chicken stock and green onion. Beat together well.
Image
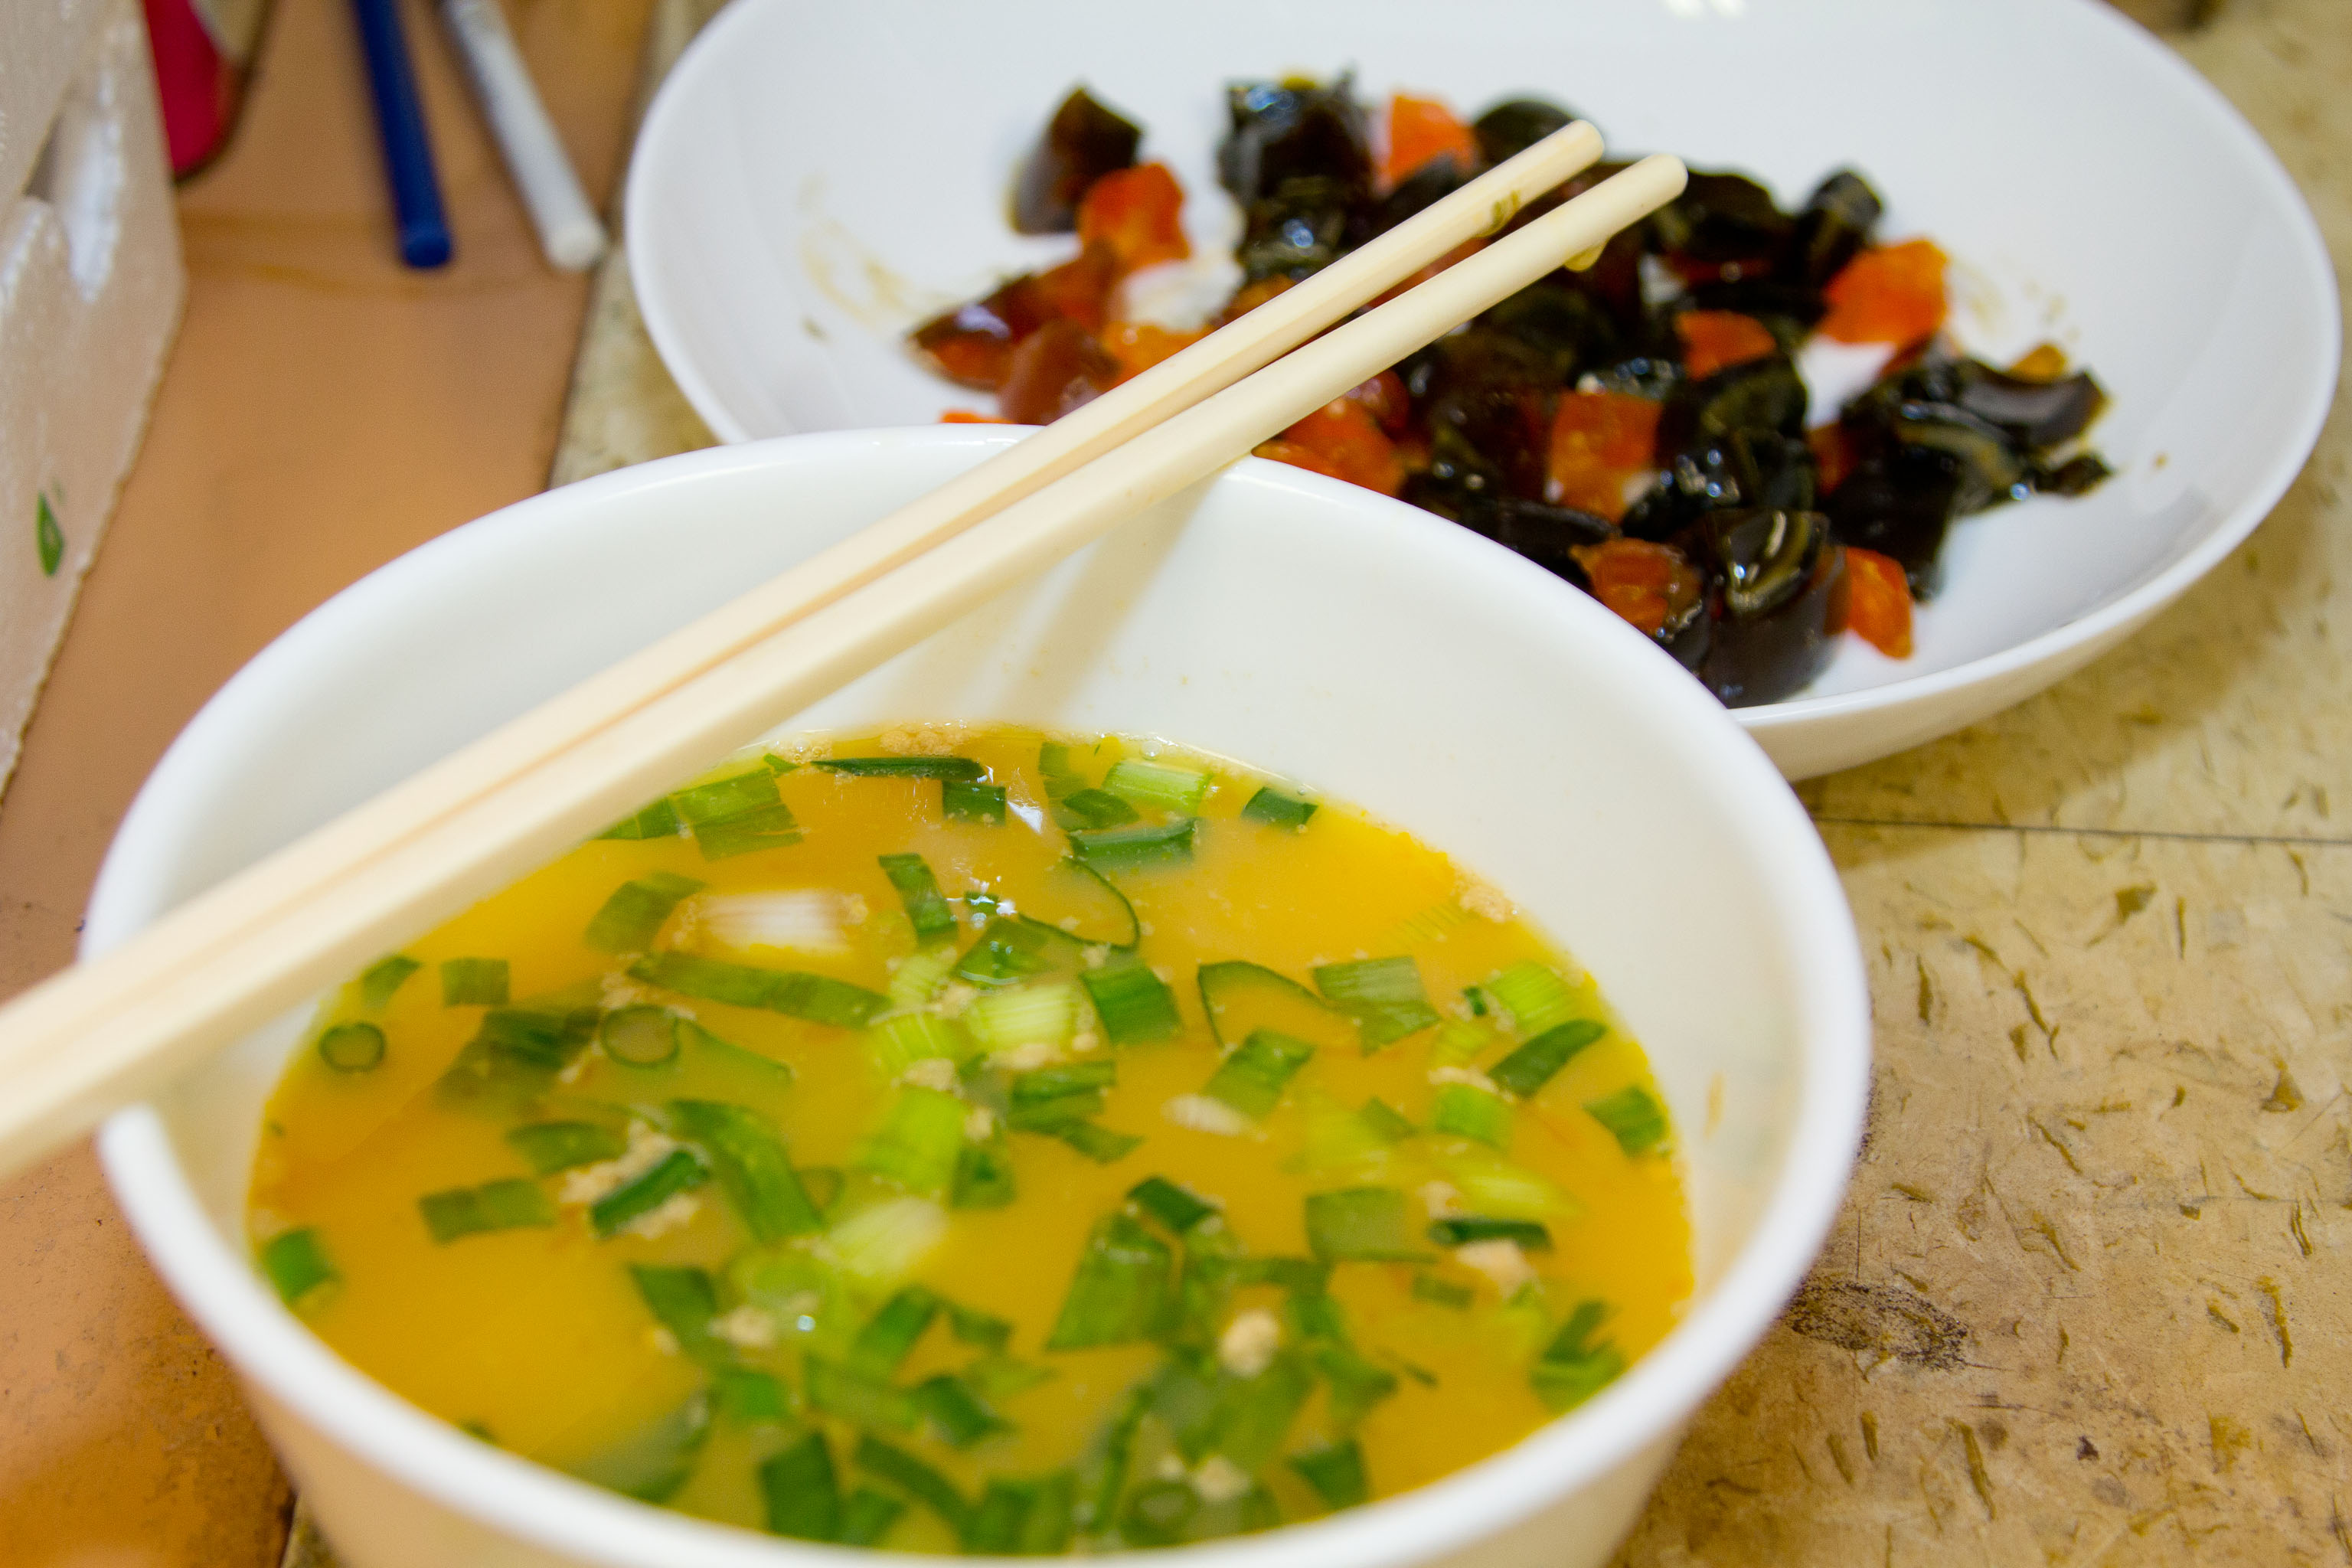
Once the 5 minutes are up, uncover the steamer and slowly pour the egg mix into plate. Cover carefully with a flat plate turned upside-down. This will ensure a smooth surface in the end. Cover the steamer and steam for 15 minutes.
Image

Image
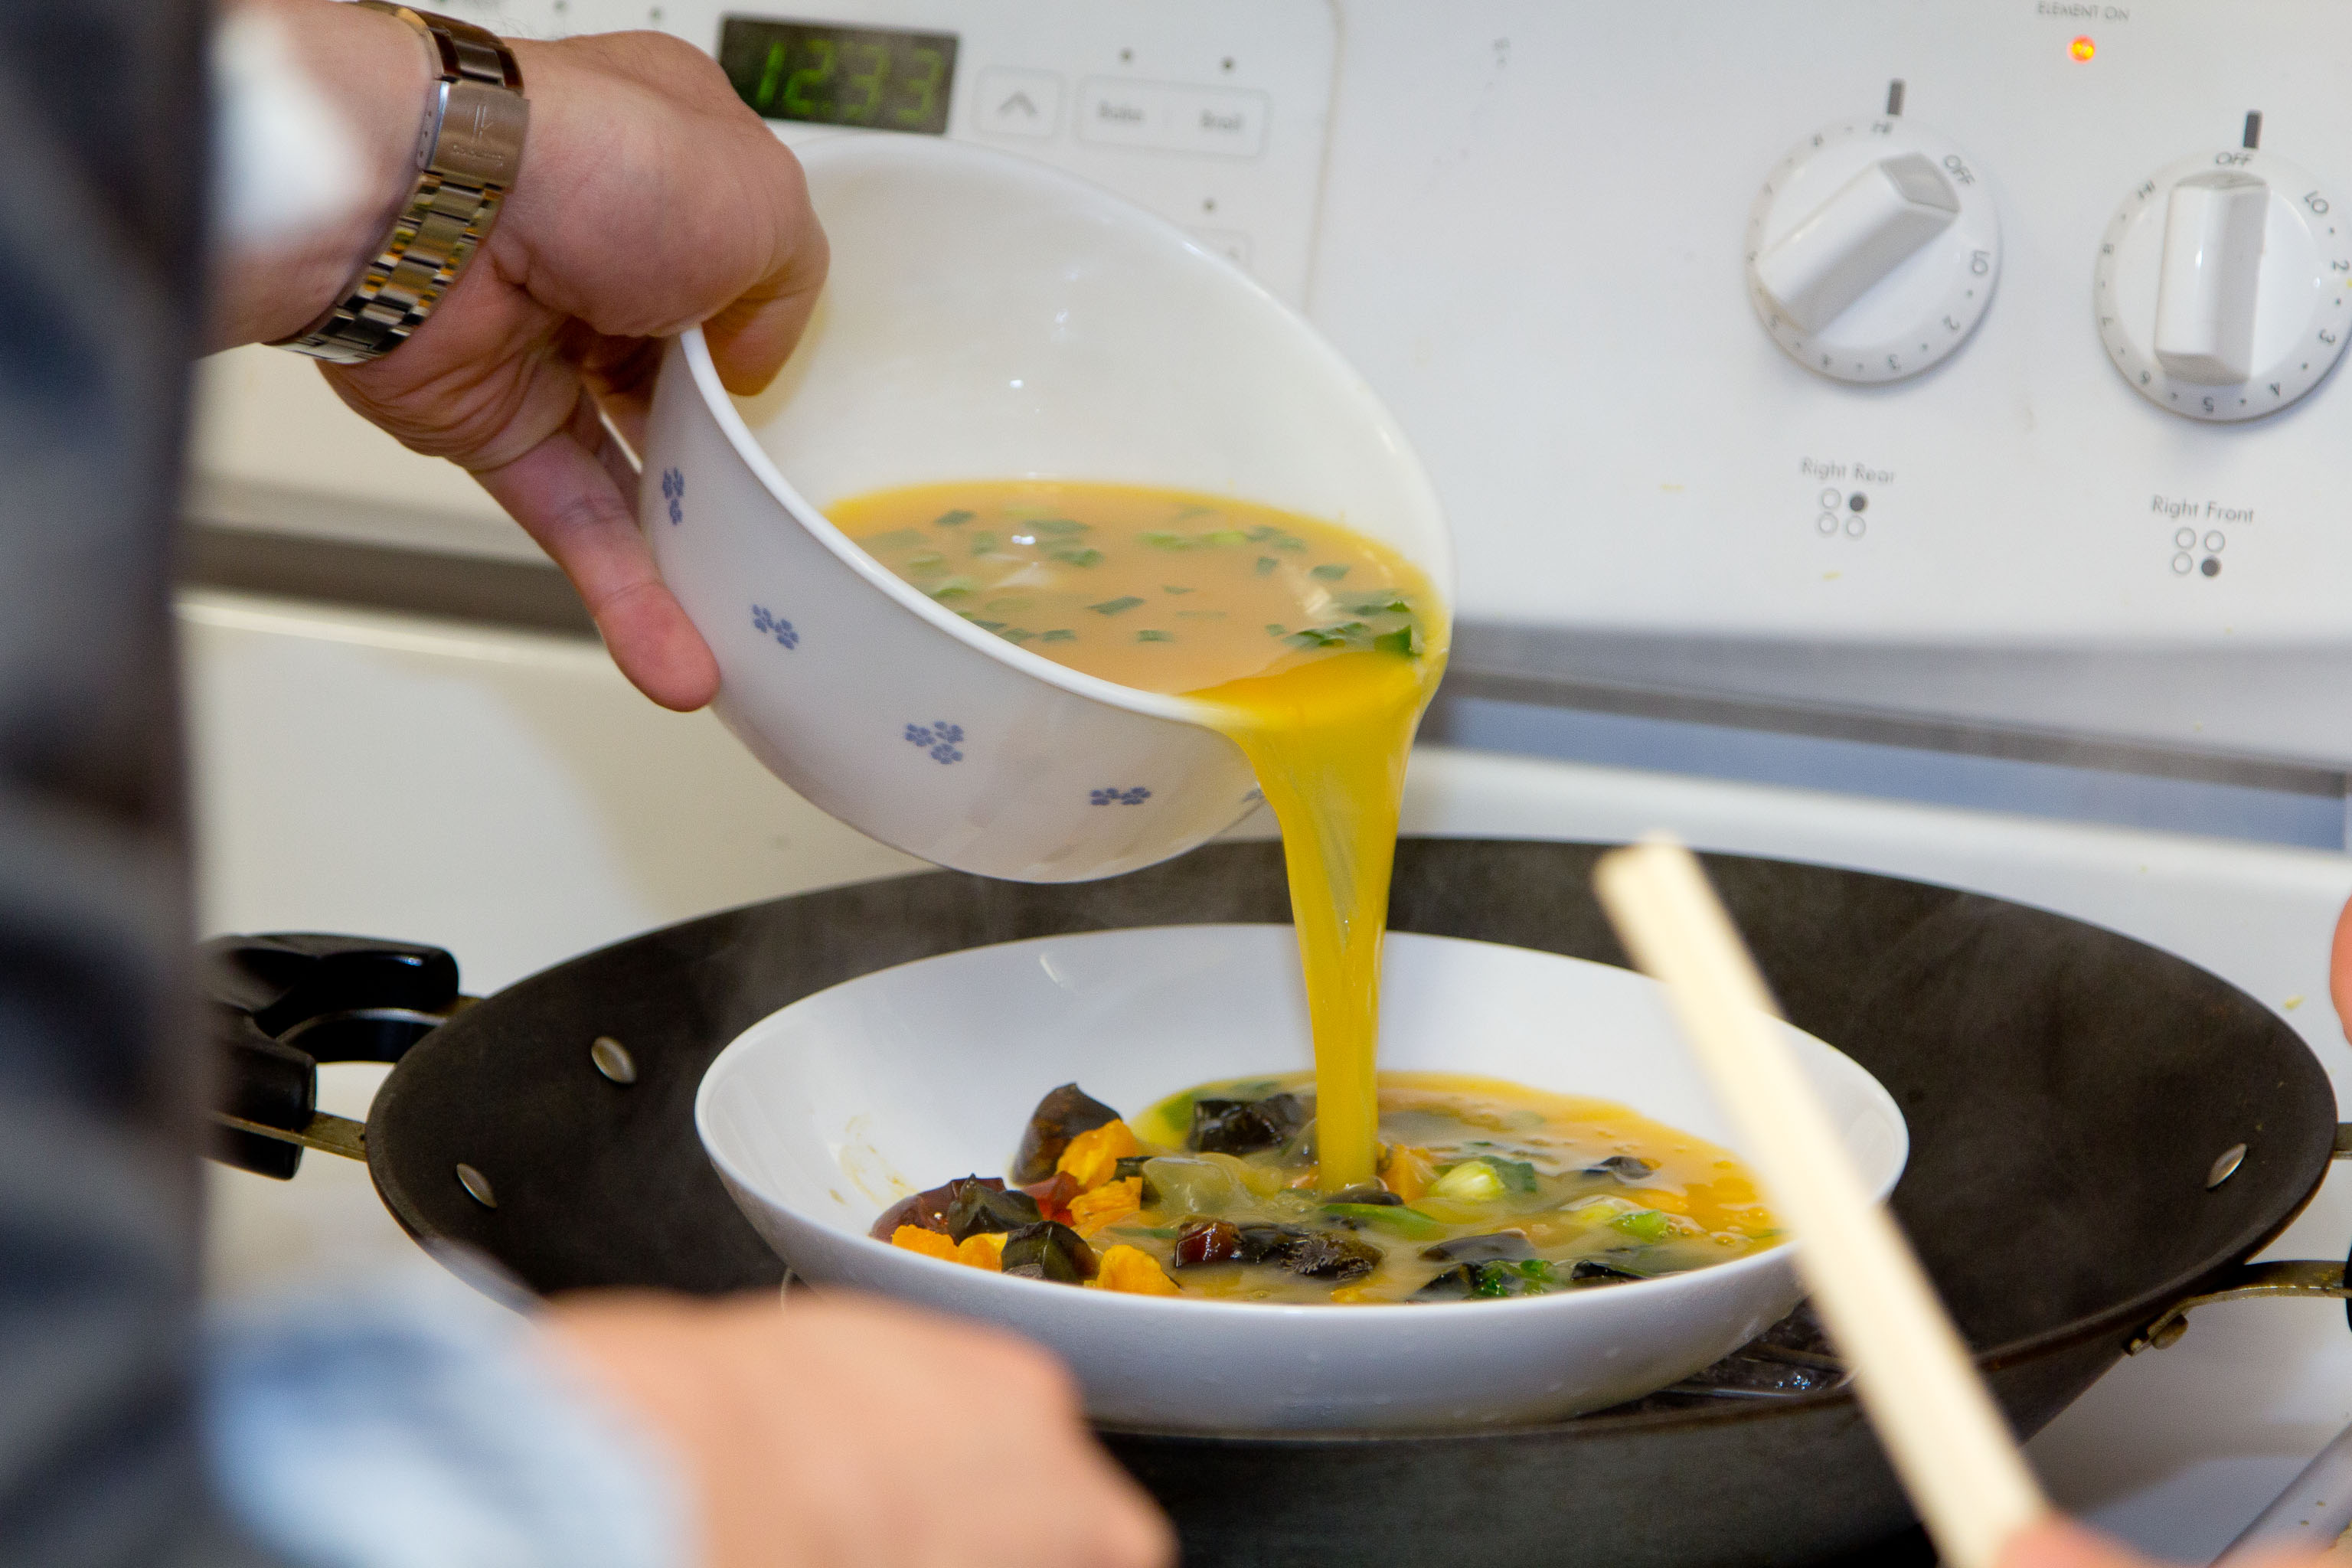
Uncover steamer and flat plate and check to see if the eggs have set. Eggs should be springy. If still wet/wobbly, steam for 5 minutes further. 

Remove dish from steamer. Finish by drizzling olive oil and soy sauce over top. 

Image
Serve hot.


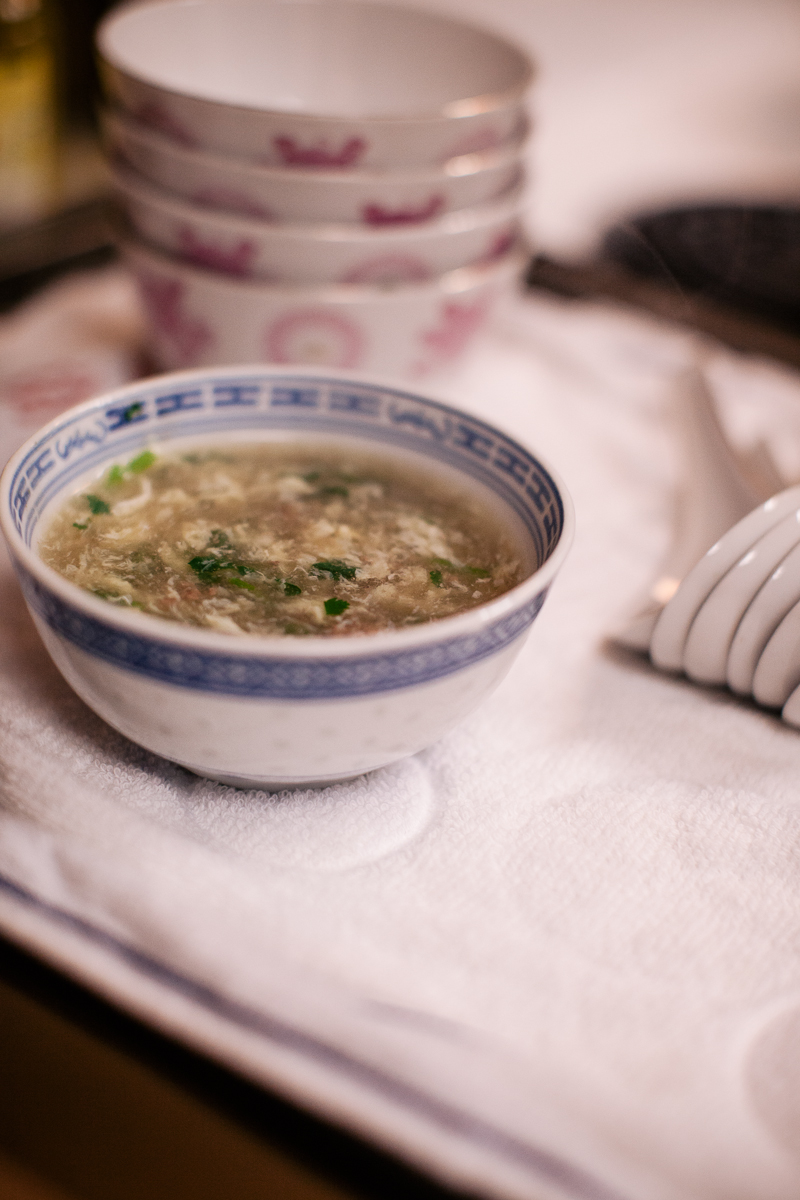
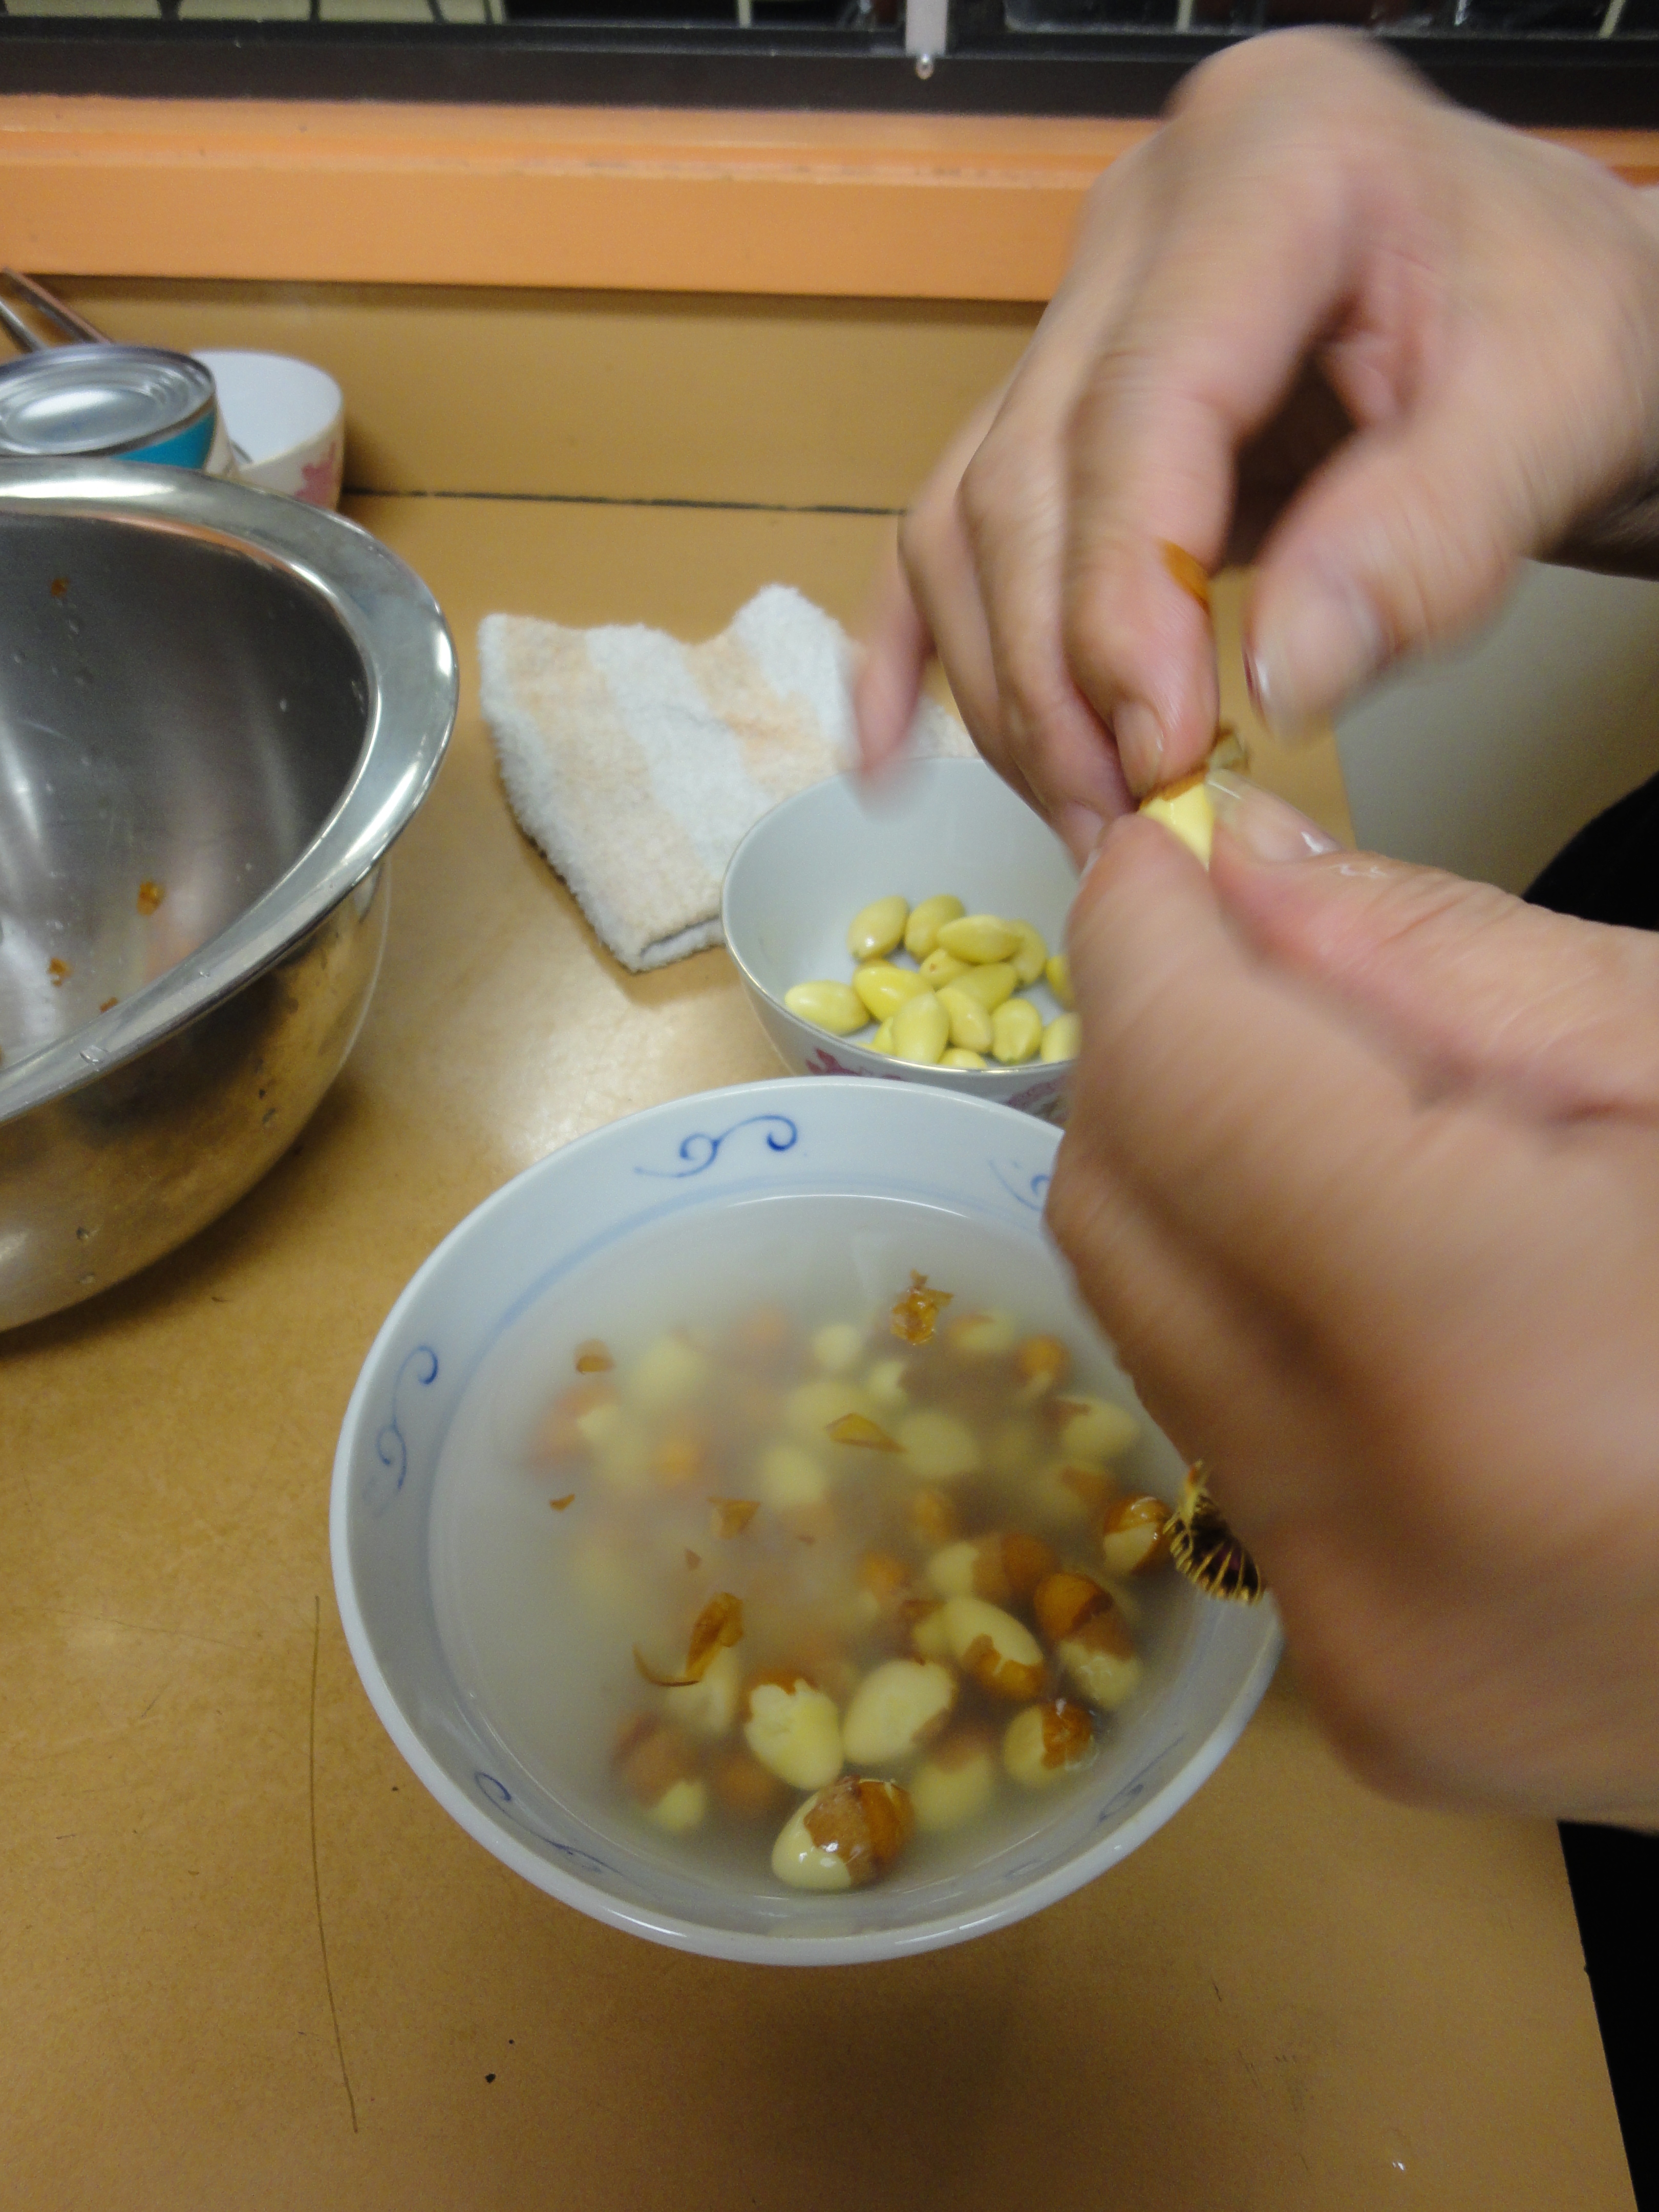
RECIPE #3 Dried Beancurd and Ginkgo Nuts Dessert 白果腐竹雞蛋糖水 – A personal favourite of mine, an easy and refreshing dessert that can be served hot or cold. Vacuum-packed, pre-shelled ginkgo nuts can be used, but are not nearly as fresh/fragrant/fun as peeling your own. Once shelled, soaking in a little hot water makes it easier to peel off the brown inner skin.

ImageServes 4
6 cups water
4 slices ginger
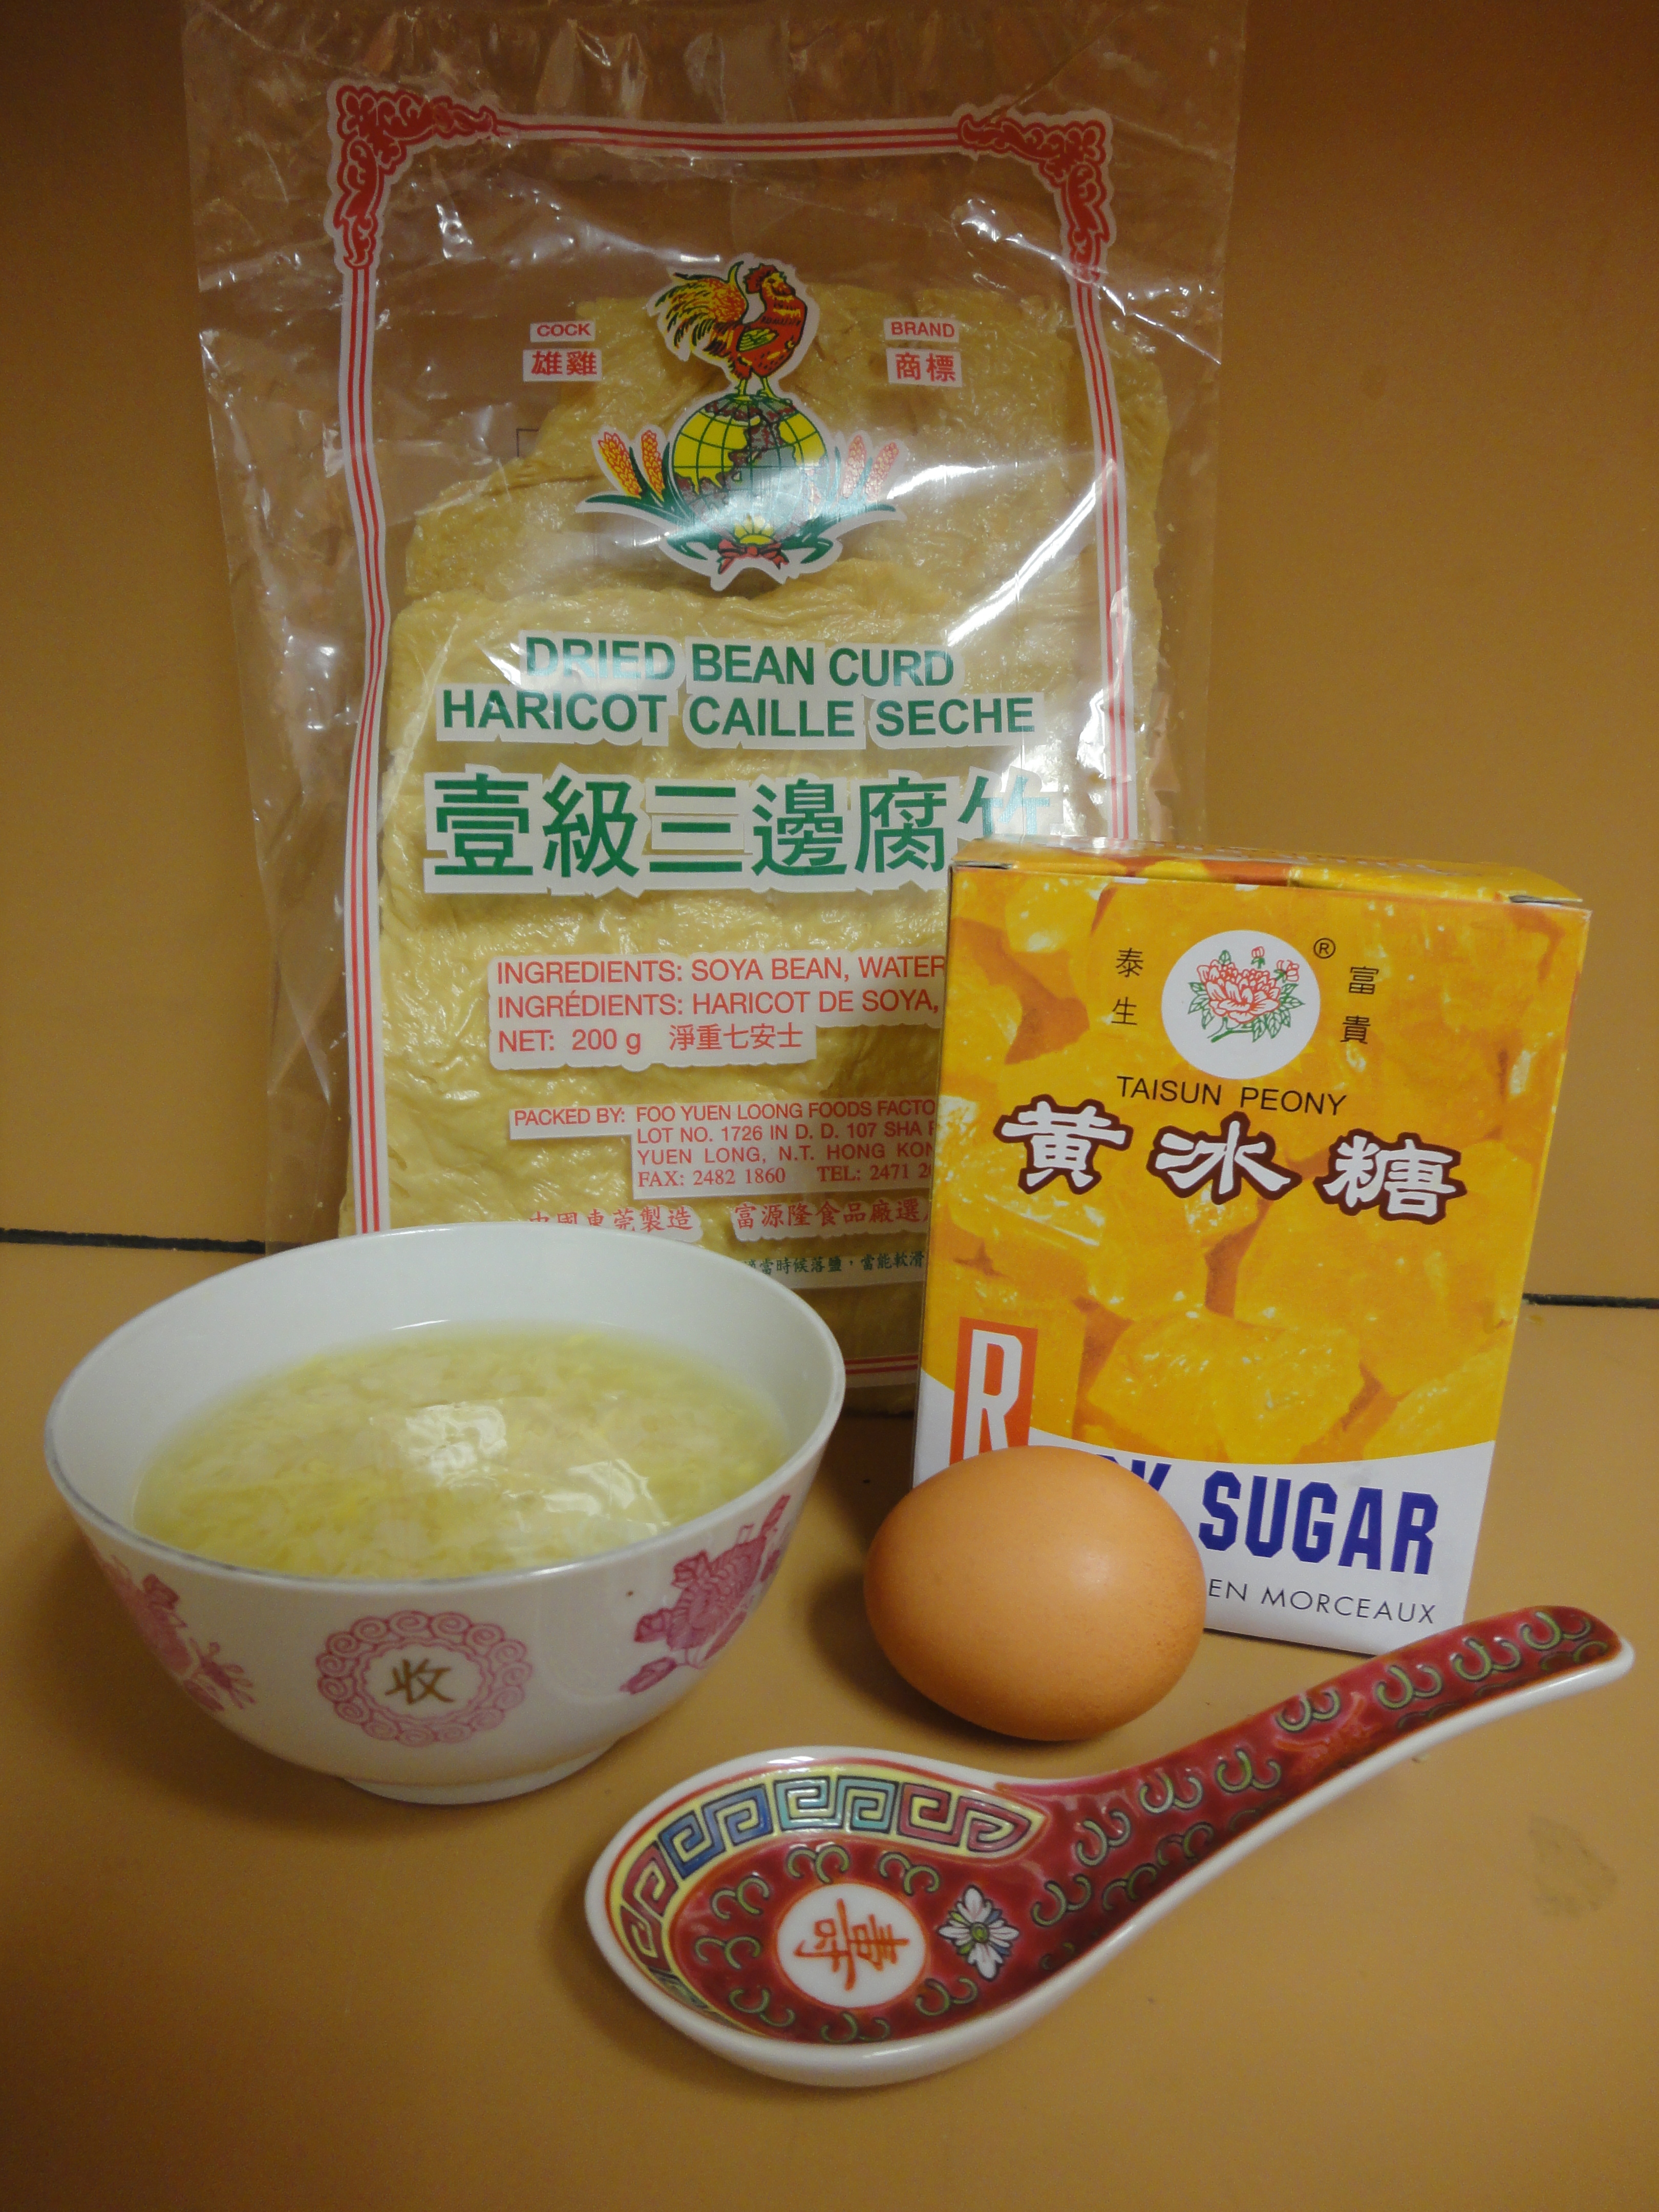
1/3 box of rock sugar, or to taste
20 to 25 gingko nuts (5 to 6 per person), shells removed 
50g dried beancurd sheets (not sticks) 
eggs, 1–2 if using as egg cloud, 2 if ½ egg per person, 4 if one egg per person

Bring water to boil in a large pot. Add ginger, sugar and gingko nuts. Turn stove to medium-low and simmer covered for 15 minutes. 
ImageSoak dried beancurd in a bowl with cold water for 15 minutes to soften, with optional 2 tsp salt to prevent the beancurd from breaking up too much. Rinse and drain in a sieve. 

Add beancurd to pot. Turn heat to medium-high and cook partially covered for 15 minutes until beancurd breaks into pieces. Watch the pot as it will easily boil over at this stage.

Add eggs according to your preference.

To create egg cloud, beat eggs in small bowl and add to pot in slow stream while stirring. 
Image
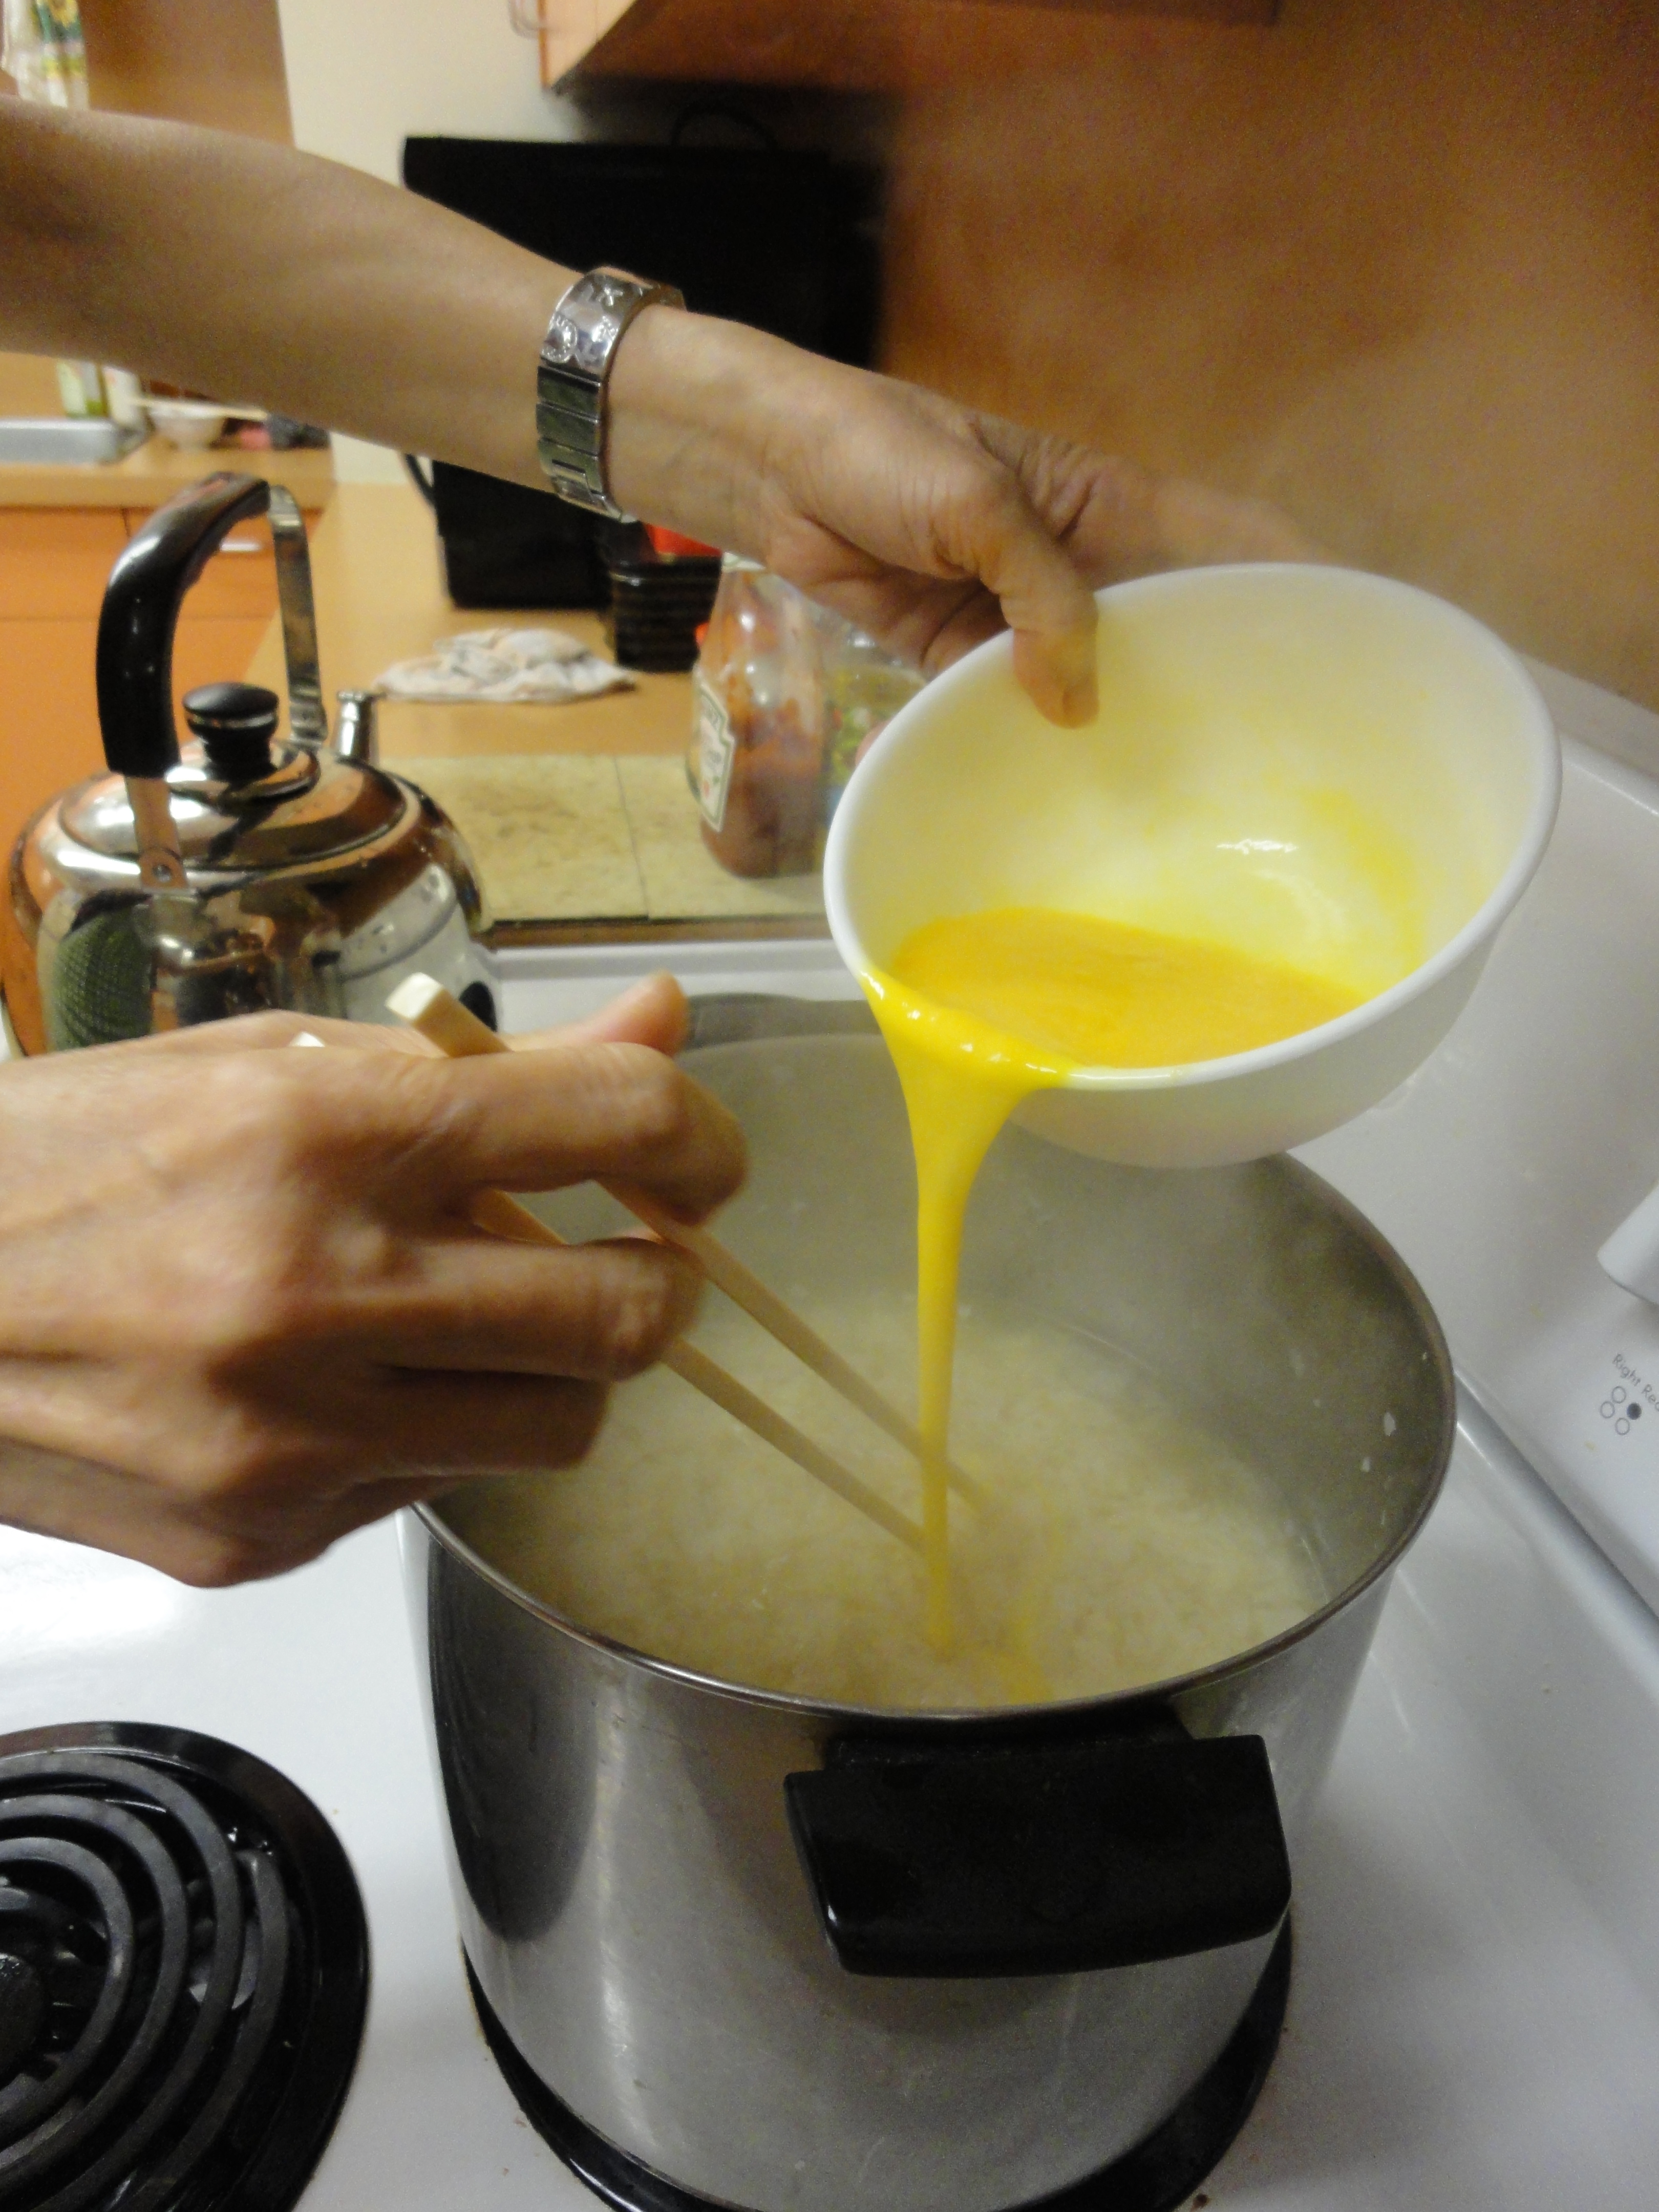
For soft-boiled eggs, turn off the heat and break and add whole cooked eggs individually to the pot, letting the heat in the pot cook the eggs, for about 5 minutes. 

For hard-boiled eggs, cook eggs separately. Serve with ½ or 1 egg per person. 

Image


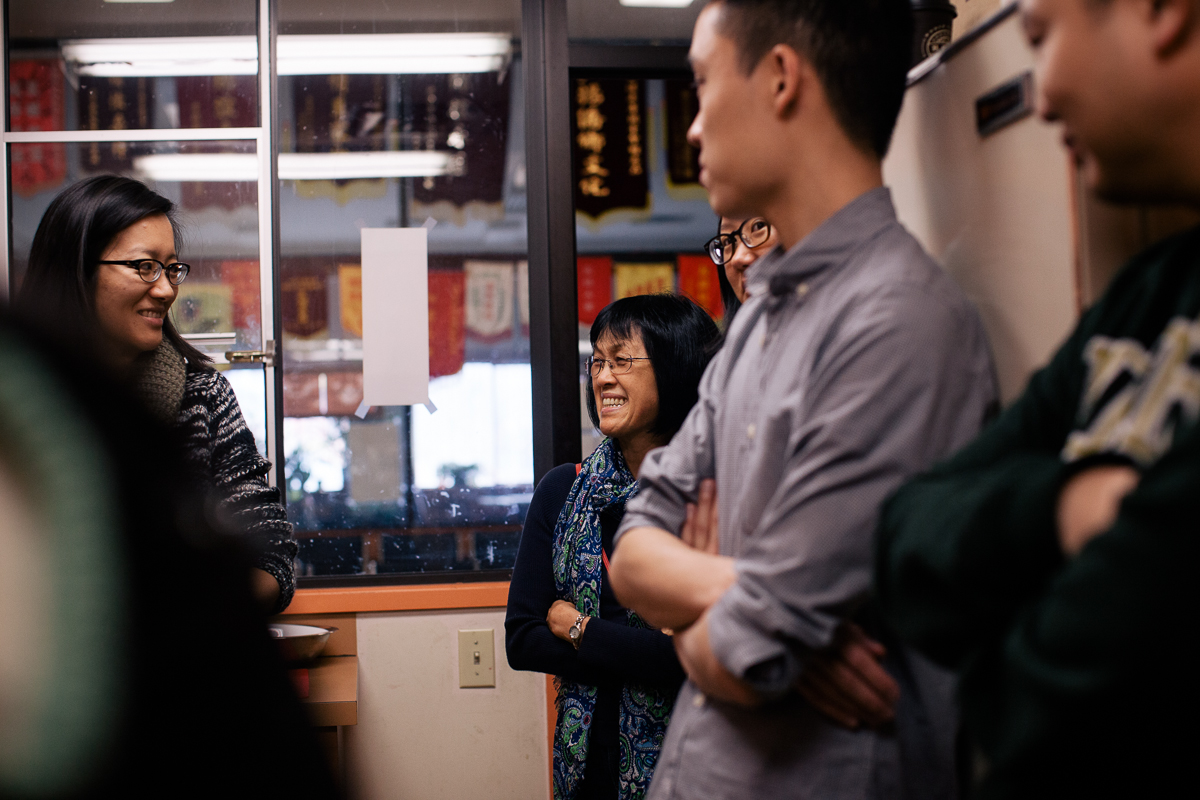
Are you interested in joining our cooking class? Is there a dish you would like to learn how to cook? Feel free to email me and we’ll try to find someone who can teach! We are thinking of holding these every 2 months and currently exploring the possibility of doing Zhong for our next session June 1st. Interested??? 

Advertisement

First Chinese Community Kitchen at HPBA


I know I’ve completed neglected this blog, but now seems to be the perfect time to revive it with so much happening in the Chinatown community this past year and my increasing involvement as well. Since my last post, my sister and I got elected to be new members on the Hoy Ping Benevolent Association (HPBA) Board of Directors, I’ve been participating at the Vancouver Chinatown Revitalization Committee meetings and am connecting with more people to discuss some of the invisible issues amongst the Chinese community.

ImageImage

In the past year, I’ve met many young Chinese-Canadian youth like myself, looking for opportunities to get involved in the Chinatown community and wanting to “get back to their cultural roots”. In October, after prancing around in our navy blue suits and giant HPBA badges at the 64th Anniversary dinner of the People’s Republic of China, my sister and I met another pair of sisters who are young board members of the Lee Benevolent Association. What was supposed to be a meeting of a few young board members turned into a meeting with about a dozen others! While sipping on milk tea and eating egg tarts at the back of Newtown Bakery in Chinatown, we discussed our concerns around the lack of young talent and engagement in Chinatown benevolent associations/societies. Filled with inspiration, ideas and passion from the group, my sister and I revived the idea of coordinating an Intergenerational Chinese Community Kitchen at the HPBA and invited those from the meeting to come participate. As a pilot, we wanted to test the level of interest among youth, the level of interest from the elder chefs and the possibility of turning this into an ongoing program of the HPBA as a means of getting more youth involved. Participants from other associations/societies came to see how it could be done in order to implement it at their respective organizations.  

Image

So, the result? Some good learning lessons, but fairly good success! There was lots of interest from youth with many RSVP-ing. Some couldn’t make it because of the semi short notice (an email notification was sent out 1 week prior), but nonetheless, the interest was there. And though we had a menu planned around the theme of eggs, again, due to short notice, our chef was unable to make it. So first lesson – give people time! 

Image

Despite this hiccup of having the chef abandoning the task, we thought of the best chef we knew – our mom. Enlisting her help, she came and taught everyone how to make Ground Beef & Cilantro Egg Drop Soup. It’s simple, fast and cheap to make. The recipe can be found below.

Image

Image

Following the soup, everyone pitched in to help dice ingredients for BBQ pork fried rice (my lazy man’s recipe can be found here). 

Image

Image

And last but certainly not least, many thanks to Josie Pure Souls Media for taking all the beautiful photographs from the cooking session!

Image

Ground Beef & Cilantro Egg Drop Soup

Egg drop soup is a Chinese soup featuring wispy beaten eggs. It makes a quick, easy, comforting meal.

Image

 
Prep time: 10 minutes
Cook time: 15 minutes
Makes 4 servings


Ingredients:
1 14oz can chicken broth
1 can water
½ lb ground beef, or other ground meat of choice
1 tsp soy sauce
1 tsp cornstarch
A few drops sesame oil (optional)
2 heaping Tbsp water chestnut powder (see Variations notes)
½ cup water
2 eggs, beaten
1 bunch cilantro, chopped
Salt
White pepper (optional)


Directions:

Marinate the ground beef with soy sauce, sesame oil and cornstarch to tenderize. Brown the beef in a small saucepan over medium high heat.
In a large soup pot, bring the chicken broth and water to a rolling boil. Add the cooked beef.
Mix the water chestnut powder with ½ cup water in a small bowl until smooth, or shake up in a small jar. Add slowly to the boiling soup while stirring to thicken to the desired consistency.
Add the eggs slowly in a thin stream while stirring the soup. The eggs should cook immediately, creating thin, silken strands of cooked egg that float in the soup.
Stir in cilantro. Season with salt. Serve with white pepper.


Variations:

  • Create a heartier soup by adding cubed tofu.
  • This soup can be made vegetarian by substituting vegetable stock for the chicken stock, and cubed tofu for the ground beef.
  • Cornstarch can be used as a substitution for the water chestnut powder if the soup is consumed immediately; otherwise any leftover soup will liquefy again. Water chestnut powder can be found in Chinese grocery stores for less than $3 for a Jello-sized box.

ImageImage

Seeing the success of this first session, we’ll be opening it up to invite others to join us. I know some of you are anxious to come participate!

Fresh Choice Kitchens, Community Kitchen and Zhong zi time!

I know I’ve been neglecting the blogosphere for a long time, but after feeling better from some health concerns that bogged me down, I’m thankfully full of motivation again and back in business!  🙂  And a lot of business I did indeed! Aside from healing, here’s what I’ve been up to lately.

Recently I discovered a great local organization in our backyard run by the Greater Vancouver Food Bank, called Fresh Choice Kitchens. Fresh Choice Kitchens is a resource and advocate for EVERYTHING community kitchen related. They run the Downtown Eastside Community Kitchen (DECK) program, provide a wealth of information and workshops on starting and running your own community kitchen and (happily!) share their knowledge and experiences in running community kitchens. I went to participate in the Community Kitchen Roundtable, where community kitchen leaders in Vancouver and beyond meet and share successes and challenges to their programs. If you’re not involved in a community kitchen program, but are thinking about starting one, I highly recommend the Community Kitchen Leadership Workshop. I had a blast hearing about others’ aspirations and experiences, and cooking together. Everyone was so supportive of my idea to start an Intergenerational Chinese Community Kitchen in Chinatown that it left me feeling motivated and inspired!

Which leads me to the second topic at hand. This past month I have been visiting the Strathcona Community Centre a lot and seen the many seniors programs held at the centre, particularly for Chinese seniors, who comprise of much of the surrounding neighbourhood. Naturally, I spread my community kitchen idea to the many seniors at the centre to see what they think, and they too are keen to pass down their culinary knowledge to young people. So, this summer, we’re starting a pilot program of the Intergenerational Chinese Community Kitchen! If you, like me, are a CBC (Chinese Born Canadian) who grew up eating Chinese food, but now have fears that you will never be able to eat those foods again, you’re the perfect candidate! If you just want to learn how to cook traditional Chinese food, you’re welcome to join us too!

What do you want to learn how to cook? What did you grow up eating? Let me know and we’ll have a knowledgeable Chinese senior teach you.

Last week, I got my mom to show me how to make zhongzi. A labourious but delicious food in Chinese culinary tradition which consists of glutinous rice and sweet or salty fillings wrapped in big bamboo leaves then boiled or steamed for several hours to cook. I won’t tell you the origins of why we eat zhongzi or give a recipe, those can be found a plenty on the Internet. Because of the wide diversity of ingredients and methods for making zhongzi, I wouldn’t want to give a recipe anyway. Even the shape of how they are wrapped varies depending on which region! Regardless, I thought I’d show you how my mom and I did ours.

No matter what your zhongzi looks or tastes like, first and foremost is the preparation of the bamboo leaves. The leaves can be bought across Chinatown, generally in the herbal shops, though you won’t need to search for them when it’s zhongzi season as they will be displayed right out front. When shopping for leaves, look for big thick leaves free of any rips or damages. Some people find it easier to wrap with small leaves. To prepare the leaves, they need to be soaked overnight, then boiled and drained, then some people soak them again. My mom even brushes each leaf to make sure they’re clean and malleable. When the leaves are wet, you get a taste of that aromatic tea smell that will help flavour the rice of the zhongzi.

Our fillings included glutinous rice, fatty pork, Chinese sausage, salty duck egg yolk, dried shrimp and either peanuts or split yellow mung beans.

Clockwise from top: glutinous rice, seasoned fatty pork, dried shrimp, boiled peanuts, salted duck egg yolks, Chinese sausage and split yellow mung beans

Our fillings tend to be quite simple but you can put just about any filling you like from Shiitake mushrooms, chestnuts and bamboo shoots to fancy fillings such as dried scallops and abalone. The selection and preparation of the fillings is where you find a big divergence in how the zhongzi is made. Some use rice where the individual grains can be seen after cooking, whereas some become a glutinous ball or wrapping around the filling. Some soak and season the rice first. Some cook the fillings first. Some marinate. You get the idea.

Next comes the wrapping part. Again, the size and shape varies based on preference and region. They can be flat and rectangular, long and cylindrical, short and pyramidal. Here’s how my family wraps our zhongzi.

This slideshow requires JavaScript.

Wrapping zhongzi takes lots of practice and skill. Mine were pretty lop-sided  =/  It also reminded me of when my sister and I went to China in 2010 and visited Zhou Zhuang, often called the “Venice of the East”, where there were food shops galore filled with small local eats. Zhongzi is abundant since it’s portable and compact and one elderly woman was catching lots of attention with her impressive zhongzi wrapping skills.

And I shall leave you with that.

Remember that if you want to participate in the community kitchen and learn how to cook traditional Chinese food, email me! d3chow@gmail.com or simply leave a comment here. Happy Eats!

Hoy Ping Benevolent Association Dinner & BBQ Pork “Fly” Rice Recipe

So this past weekend, my yenyen, sister and I attended the Hoy Ping Benevolent Association dinner and we met lots of people. Since there was a big audience (about 450 people) at the dinner, my sister and I decided to seize the moment and appeal to the young people in the room. We asked our good friend, the chairman of the Hoy Ping Association, to allot some time for us to go on stage and speak to the crowd. Although the room was loud and not too many people were listening, we had a rare opportunity to chat with NDP-MLA Jenny Kwan, Vancouver City Councillor Raymond Louie and Councillor Kerry Jang. I also hung out with the association’s Kung Fu club as they showed a great slideshow of the team’s part in the Chinatown Parade back in January. And it seemed our appearance on stage worked. In the last 15 minutes of the dinner, Janet approached our table to chat! Thanks Janet!

Unfortunately, in all the excitement, I forgot to take pictures… Please forgive me, I’m still trying to get used to blogging and taking pictures of everything I’m doing. But hopefully my BBQ Pork “Fly” Rice recipe will make up for it. 🙂

This recipe is the first Chinese dish I ever learned to make. When we were growing up, my mom would go play mahjong on the weekends (and as you probably know, serious mahjong games run for at least 4 hours) and had to make a quick meal for us before she left and it was often BBQ fried rice. Aside from the BBQ pork, all the other ingredients are already often found in most Chinese kitchens, or at least ours anyway.

These days, fried rice has entered the realm of westernized Chinese food, being lumped into the same camp as sweet and sour pork, chicken chow mein and egg rolls, but not so! Fried/sticky rice is served at big banquet meals, albeit at the end. At more formal dinners, rice and/or noodles is served at the end as a filler after you’ve enjoyed the real dishes of sea cucumber, crab, duck etc. So, this dish can be made in a snap for a quick meal, like I did last night, or to accompany a formal dinner.

BBQ Pork “Fly” Rice
2 cups (muk) rice
1/2 lb BBQ pork
1/2 an onion (red or white, doesn’t really matter) or 1 shallot or 3 scallions
1/2-1 cup frozen peas
8-10 frozen tiger prawns (or fresh, but it would be a waste)
2 eggs, beaten
1 1/2 tsp hoisen sauce (often called oyster sauce)
1 1/2-2 tblsp of oil ie. vegetable or grapeseed, not olive oil or peanut as these have too much flavour
 
Wash 2 cups of rice in cold water and cook. The most common way to cook rice these days is in a rice cooker, but if you have a ceramic pot, it supposedly tastes better, you would just have to time it. For fried rice, the best is actually to use old rice because freshly cooked rice sticks together. If you’re using freshly cooked rice, make it as early as possible, then fluff with chopsticks and cool the rice for as long as possible.

While the rice is cooking and cooling, defrost the frozen peas and tiger prawns, I just do this in a bowl of water and it doesn’t have to be completely defrosted, just enough so there’s no ice and they’re free. Dice the onion/shallot/scallions, whichever you’re using, and the BBQ pork. Once the prawns are defrosted, drain the water then peel and cut into 1/2-1 inch pieces. Drain the peas once they are defrosted. Set up all your ingredients so they’re convenient as you’re cooking.
Once the rice is cooled and ready to go, take out your wok. Ideally you use a wok since it’s superior to the frying pan due to it’s size, efficiency and versatility, but if a frying pan is all you’ve got, it’ll do. Just use the largest once you’ve got.
Heat the wok and oil over high heat.
 
From this point on, you will be adding each ingredient one at a time, tossing or “sautéing” and allowing each ingredient to cook in between, with the rawest ingredients added first. The order is as follows:
1. Onions – cook until it smells so good you’re tempted to reach into the wok with your bare hands for a taste… or until slightly golden.
2. Tiger prawns – prawns are cooked once they turn orange. DON’T cook them all the way or they will be tough and stringy by the time you’re done. Cook them until you start to see some orange.
3 & 4. Peas & BBQ pork – just toss ’em around so they heat up and the flavours of each ingredient are distributed. After a while, you may begin to notice that the bottom of the wok is sticking, this is because of the sugar from the BBQ pork burning. Turn down the heat to med-high. My idea of med-high is 7-8.
5. Rice – dump all the rice into the wok and using the blade of your spatula, break up any clumps.
6. Hoisen Sauce – drizzle over top and toss until the sauce is evenly distributed.
7. Egg – this is the part that makes it fried rice and is the last step. Pour the egg over top and toss vigorously. If you let it sit for too long, the egg travels to the bottom of the wok and cooks by itself, resulting in scrambled eggs. What you want is for the rice to be coated in egg.
Keep tossing until the egg is cooked and the rice doesn’t look wet with raw egg.
 
If you’re not eating the rice right away, I like to keep it warm in the rice cooker, but fried rice to me is like pizza, it can be enjoyed hot or cold. 😉 
 
This is the first time I’ve ever taken pictures while cooking and giving directions for it so feedback is welcomed and strongly encouraged! Also, if you try the recipe out, please let me know what you thought of it, or if you made any modifications. I’d be happy to hear from you!